Want to contribute? Please join our Discord server and ask to be a Wiki Editor.
¶ Creating a Page
For this example, we will be creating an entry for an Apple Extended Keyboard.
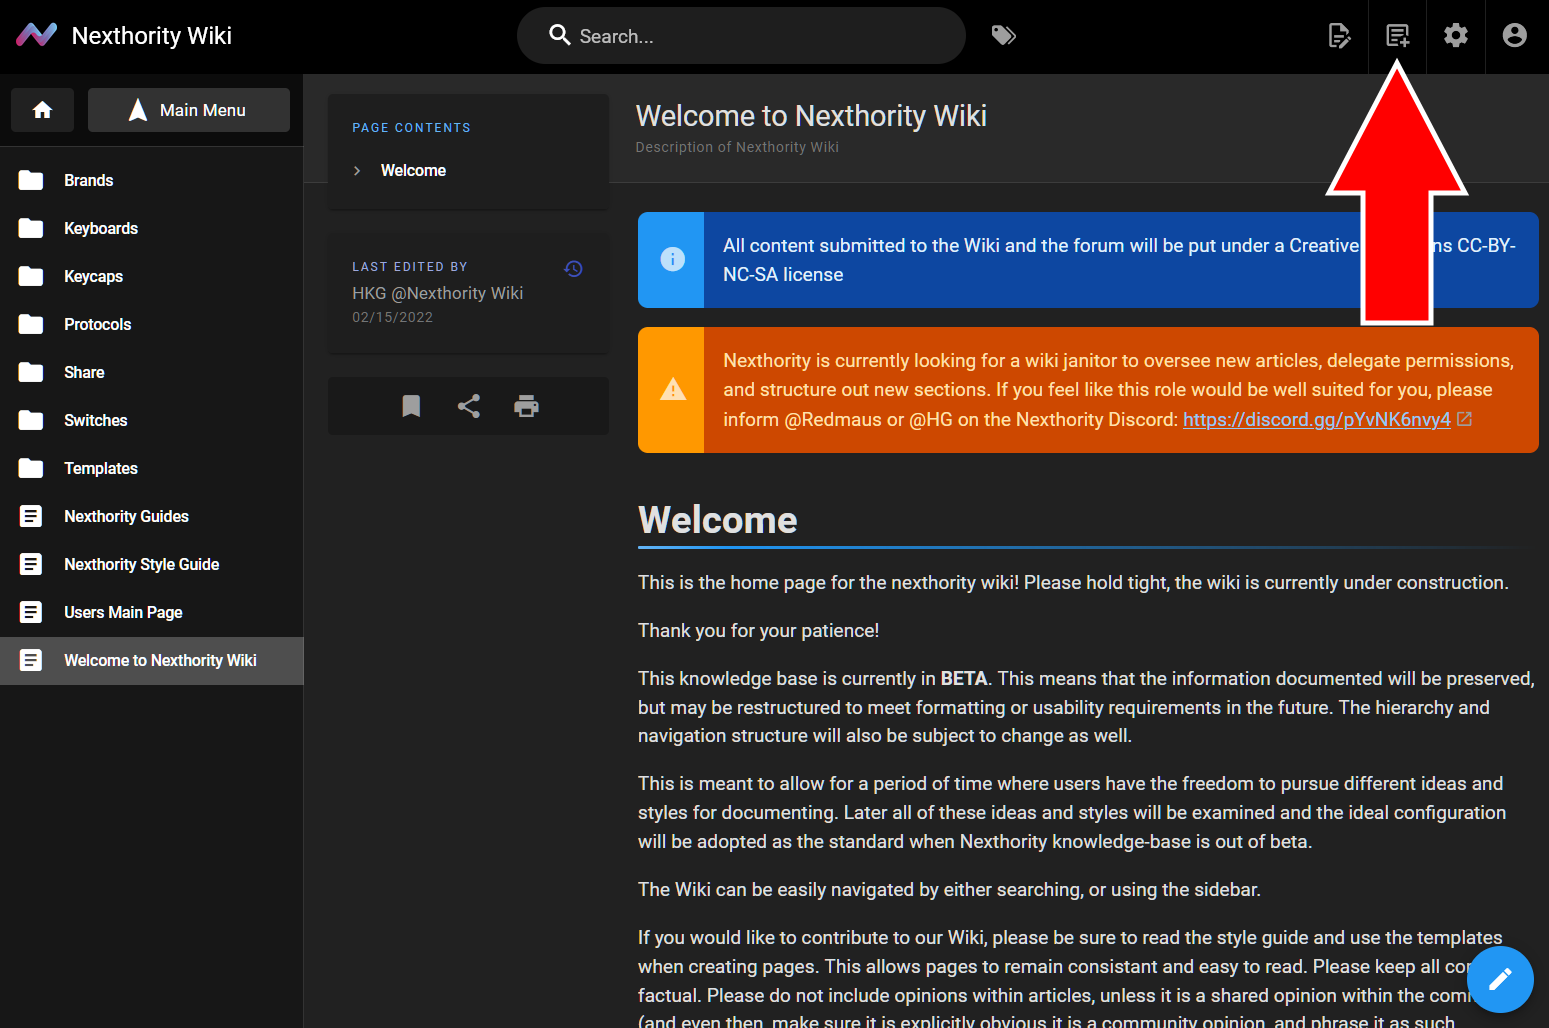
1. Press the New Page button on the top right corner
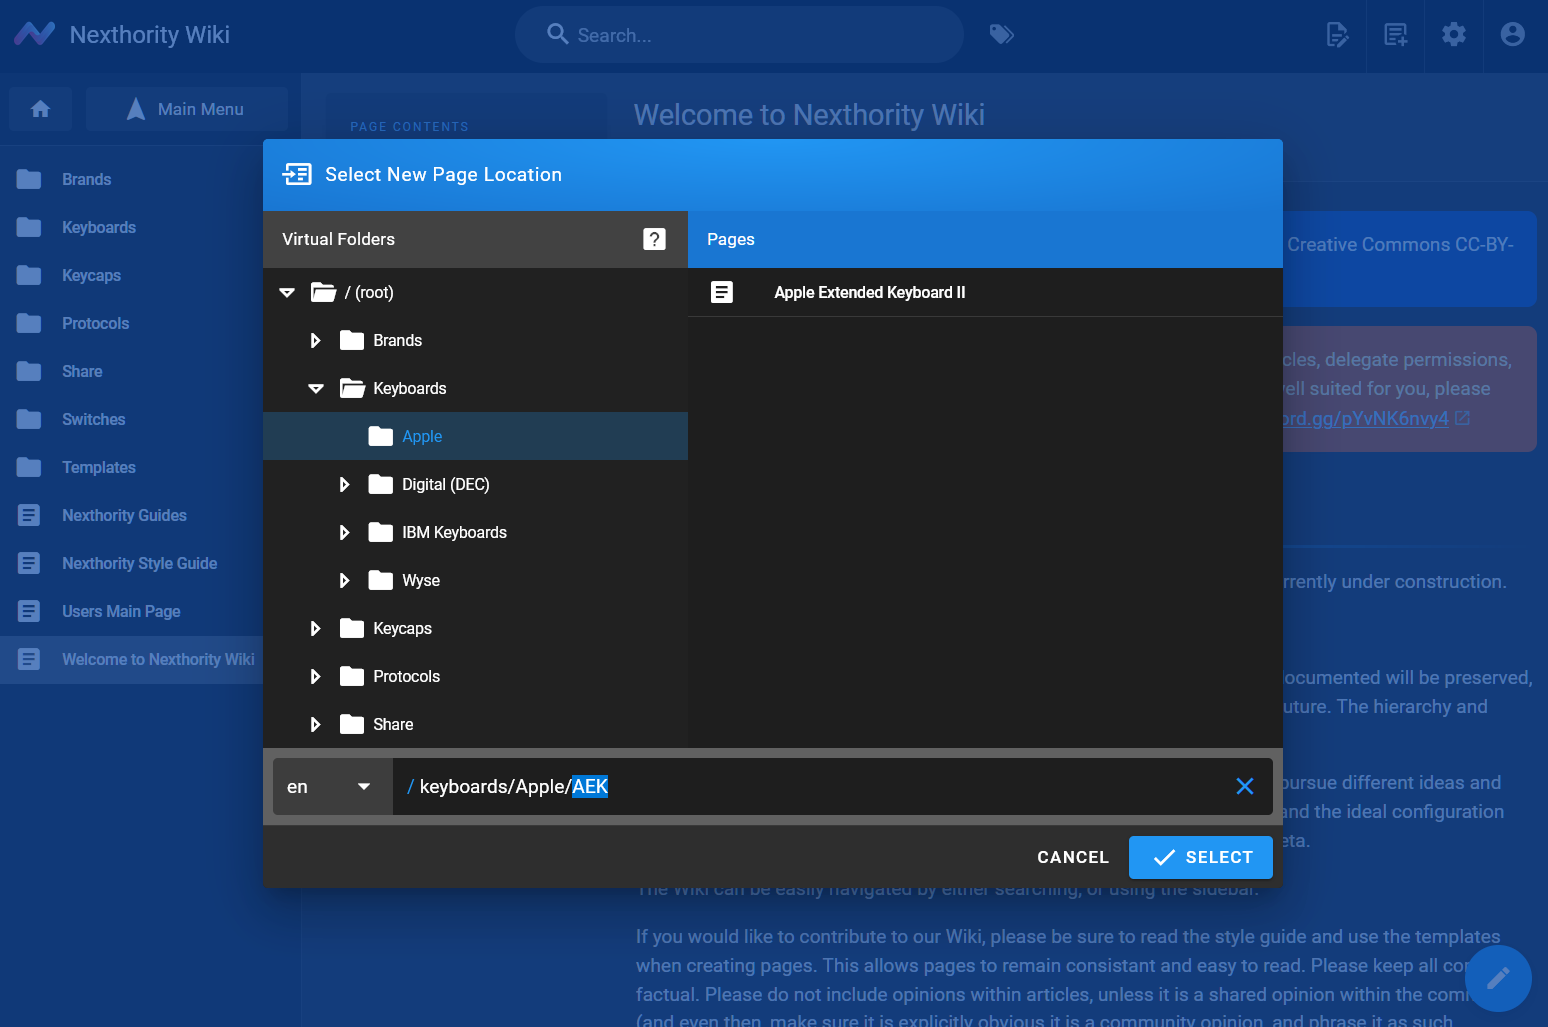
2. Determine the relevant location of the page. For example, an Apple Extended Keyboard should be placed in /Keyboards/Apple/AEK. If there is no brand category that suits your entry, please create one. For Example, do not dump it in /Keyboards/AEK. This just creates a headache down the line when more keyboards of a specific brand. Once you complete this step, Press Select.
- You are replacing
new-pagewith the name of the page (and the directory it goes in). - When naming the path, please do not write in lowercase. Additionally, try and keep file names fairly short. Do not leave spaces, use hyphens (dashes). If an abbreviation for that product exists, use that as the page path. You will have a chance to change the display name later.
- If the brand does not exist in the directory, after creating that directory and finishing your page, you should also create a page at
/Keyboards/Apple. This page should contain links to all keyboards within the Apple directory (do not use a template for pages that only contain links to other pages - look at other pages for a reference of how links should be formatted). Additionally since you are the first person to be creating a new brand directory, you should also add a link to/Keyboards/Appleto/Keyboards. Example images will be shown at the end of this tutorial.
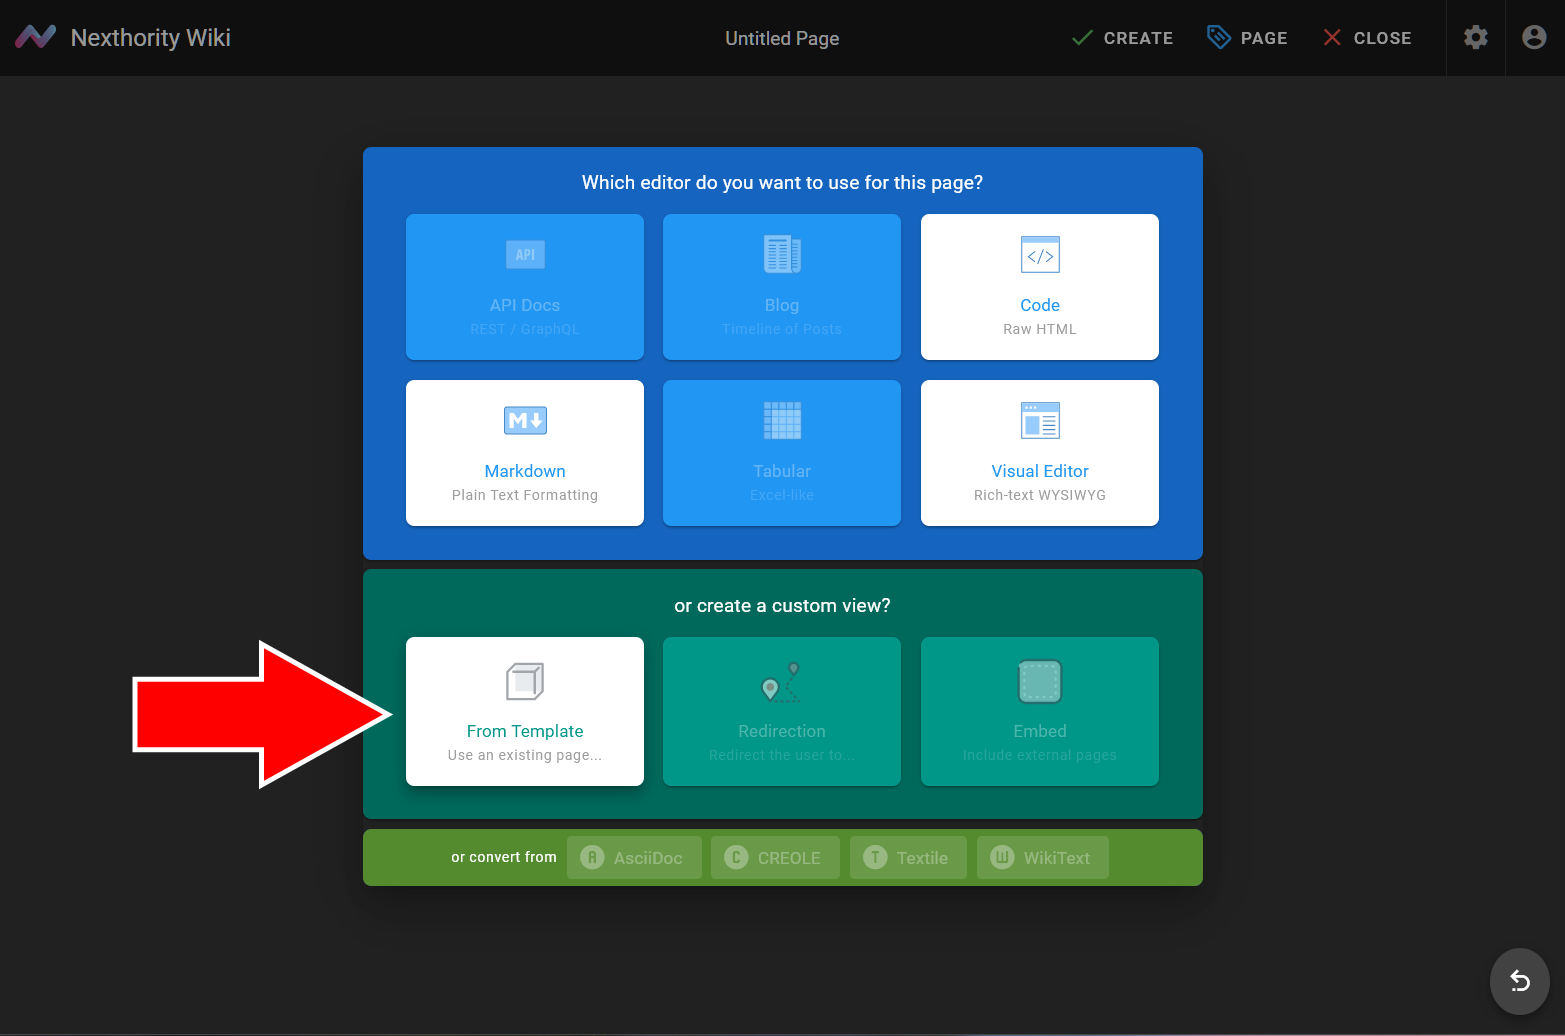
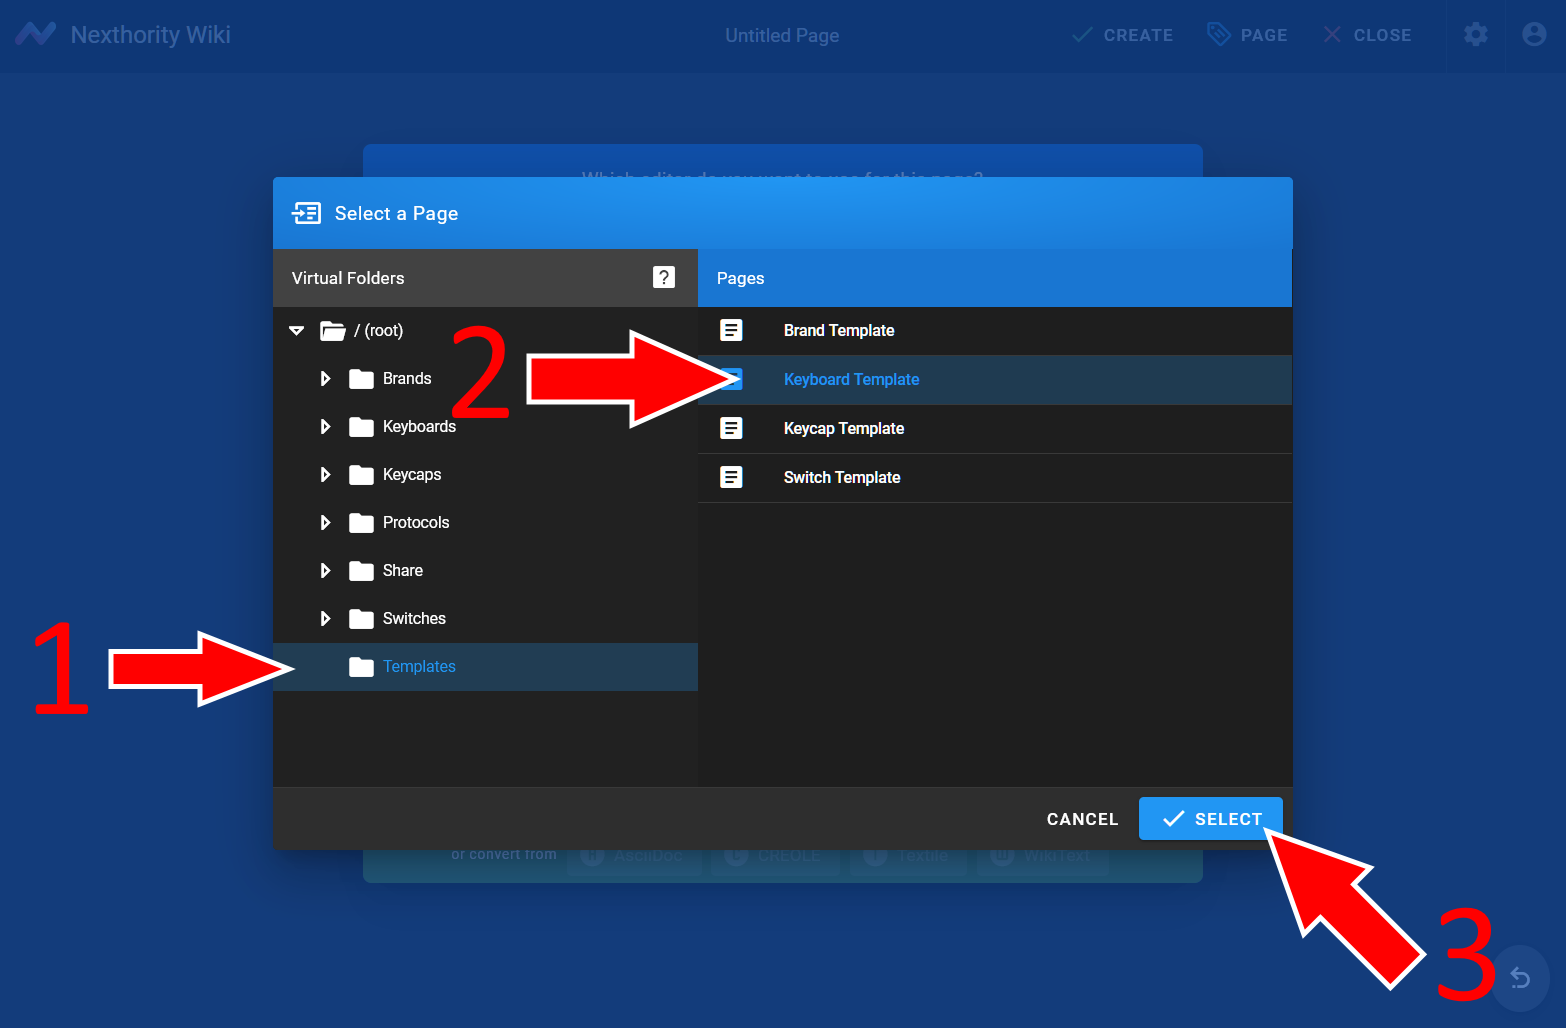
3. You should be greeted with a prompt asking what type of page you want to create. Click From Template. Then, click on the Templates folder. Select the template that matches the type of page you are creating. For our Apple Extended Keyboard, we will select the Keyboard Template.
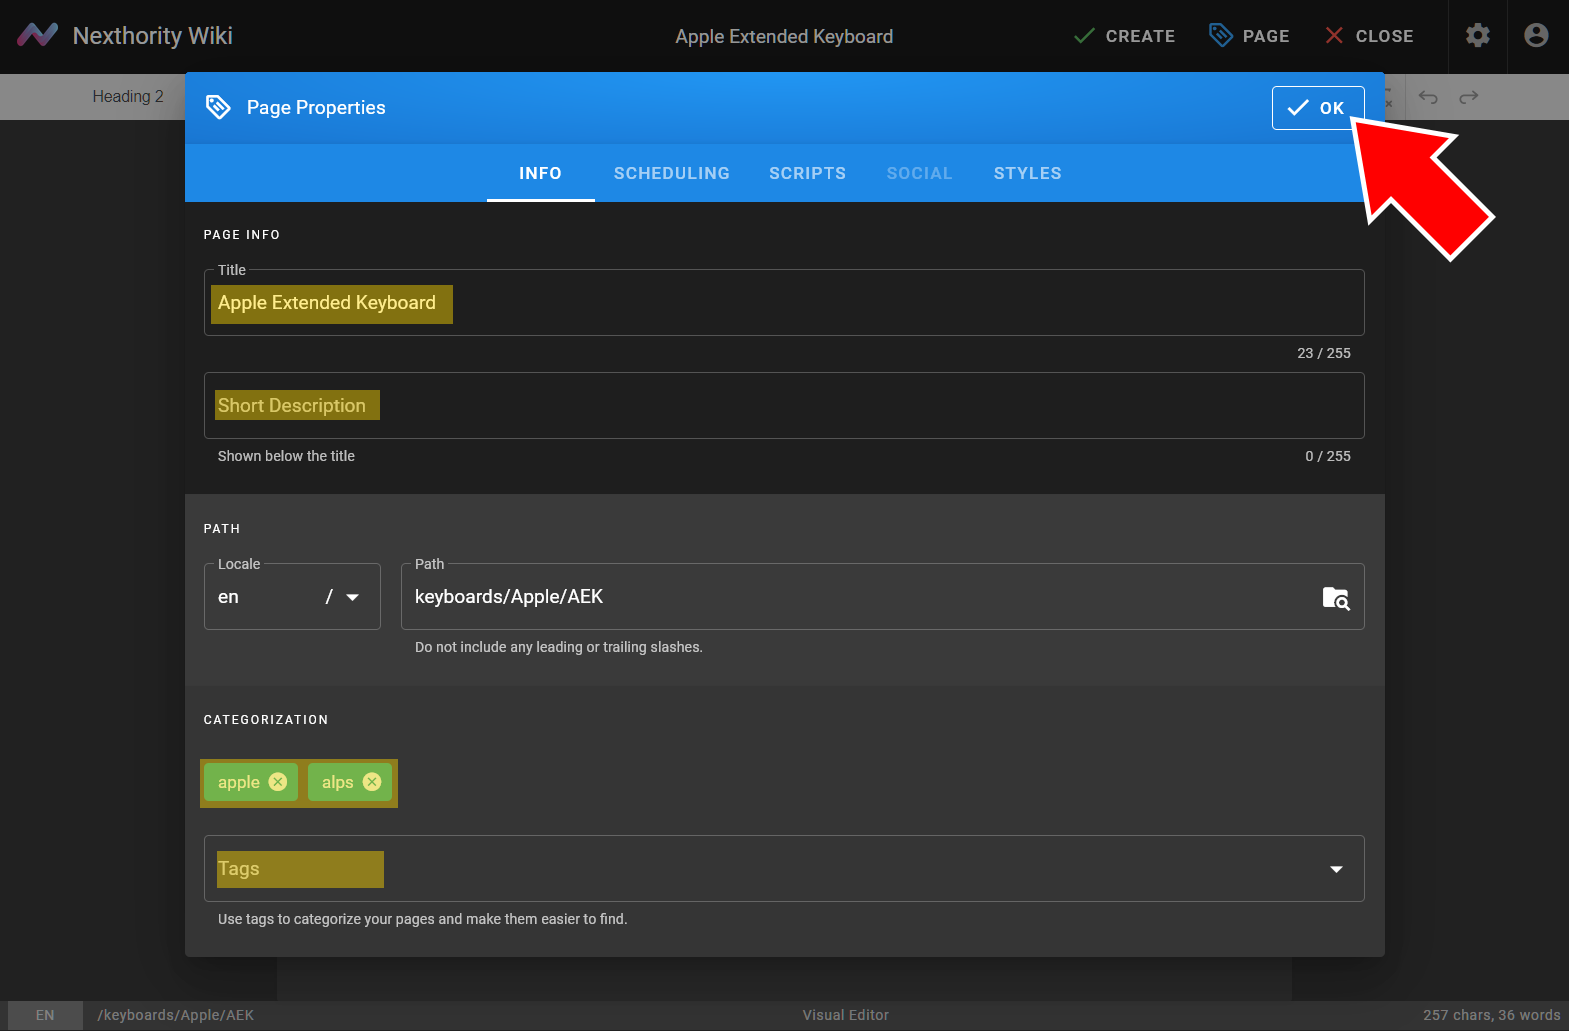
4. You will be greeted with a pop up. For the Title field, format the title with the proper name, using proper capitalization and spaces. If applicable, in the tags section, please add the switches that are used by the keyboard or any other things that you think warrant a tag. Do not separate tags with commas. Instead, press the Enter key for each tag. Press OK when you are finished. To bring this pop-up in the future, press the Page button in the top right.
- Optionally, you may also add a short description in the appropriate field.
- This is also your last chance to change the page path. If you made a mistake, change it now. It will be a big headache to change it after you publish the page as any links pointing to this page will have to be manually updated.
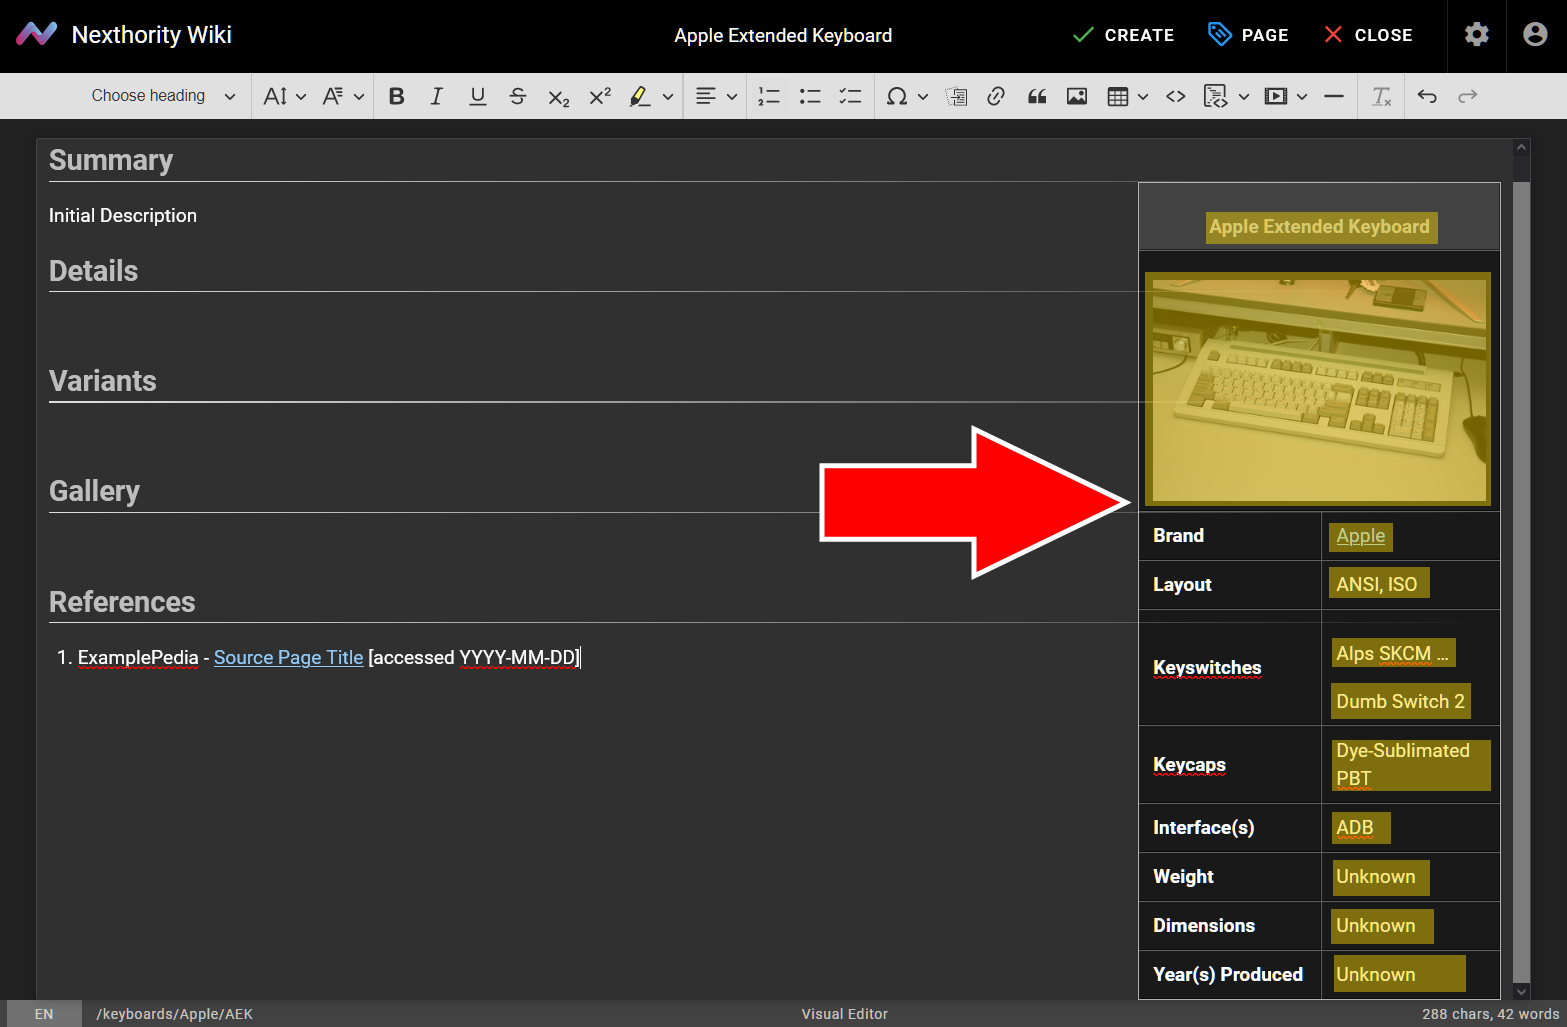
5. Fill in the fields in the info card in the right. Due to a bug with Wiki.js, the headers overlap some fields in the editor. You may have to select a different field, and use the arrow keys to move to the field you want to modify. Dont forget to update the <Full Name Here> field at the top of the info card, along with the image.
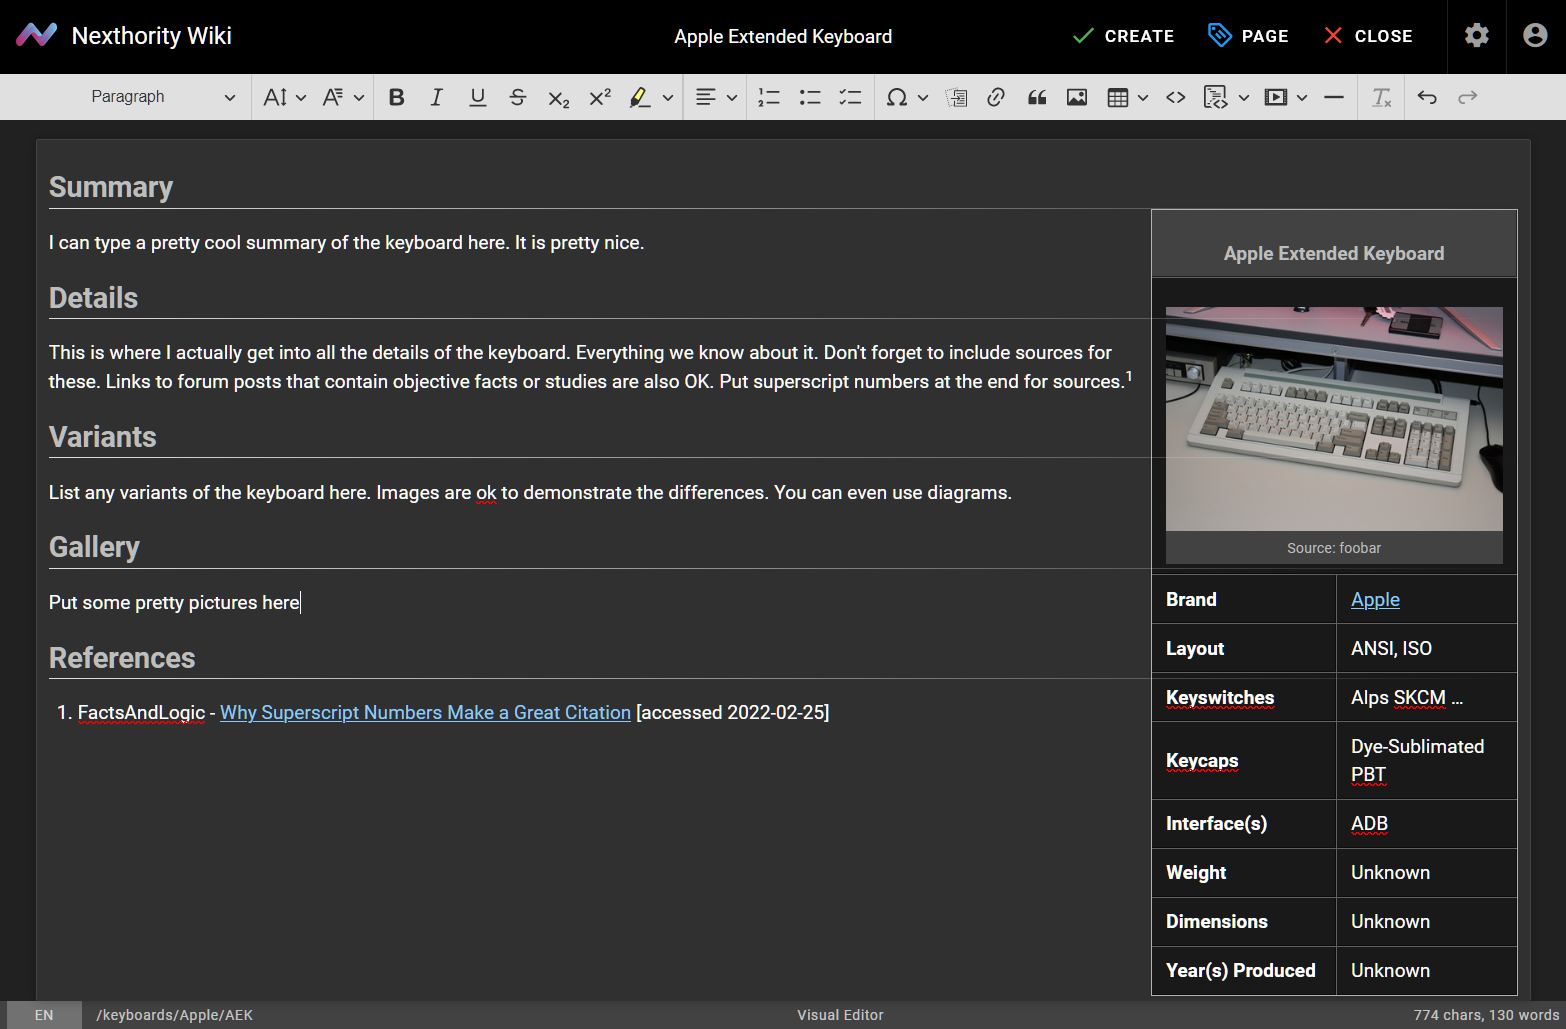
6. Everything else should be fairly simple to do. Just write. Make sure to add sources to your writing. If possible, please put a superscript number corresponding to the source at the bottom of the page. Leave sources at the bottom in the same format as the example source that is part of the template. The accessed date is the date you viewed the source. This is important in case the contents of the linked page change.
- Important note for images: Please upload the images to Nexthority. Do not paste images from external websites. The reason for this is because if the source website goes down, then it will take the image down with it. Saving images to Nexthority prevents this risk. Be sure to credit images that you use that are not your own. Respect the copyright holder's rights if they do not want their image used on our website.
- Want to add multiple images to the Gallery section? We highly encourage you to put them into a table so they display next to each other. Please keep it to a max of 3 images per row.
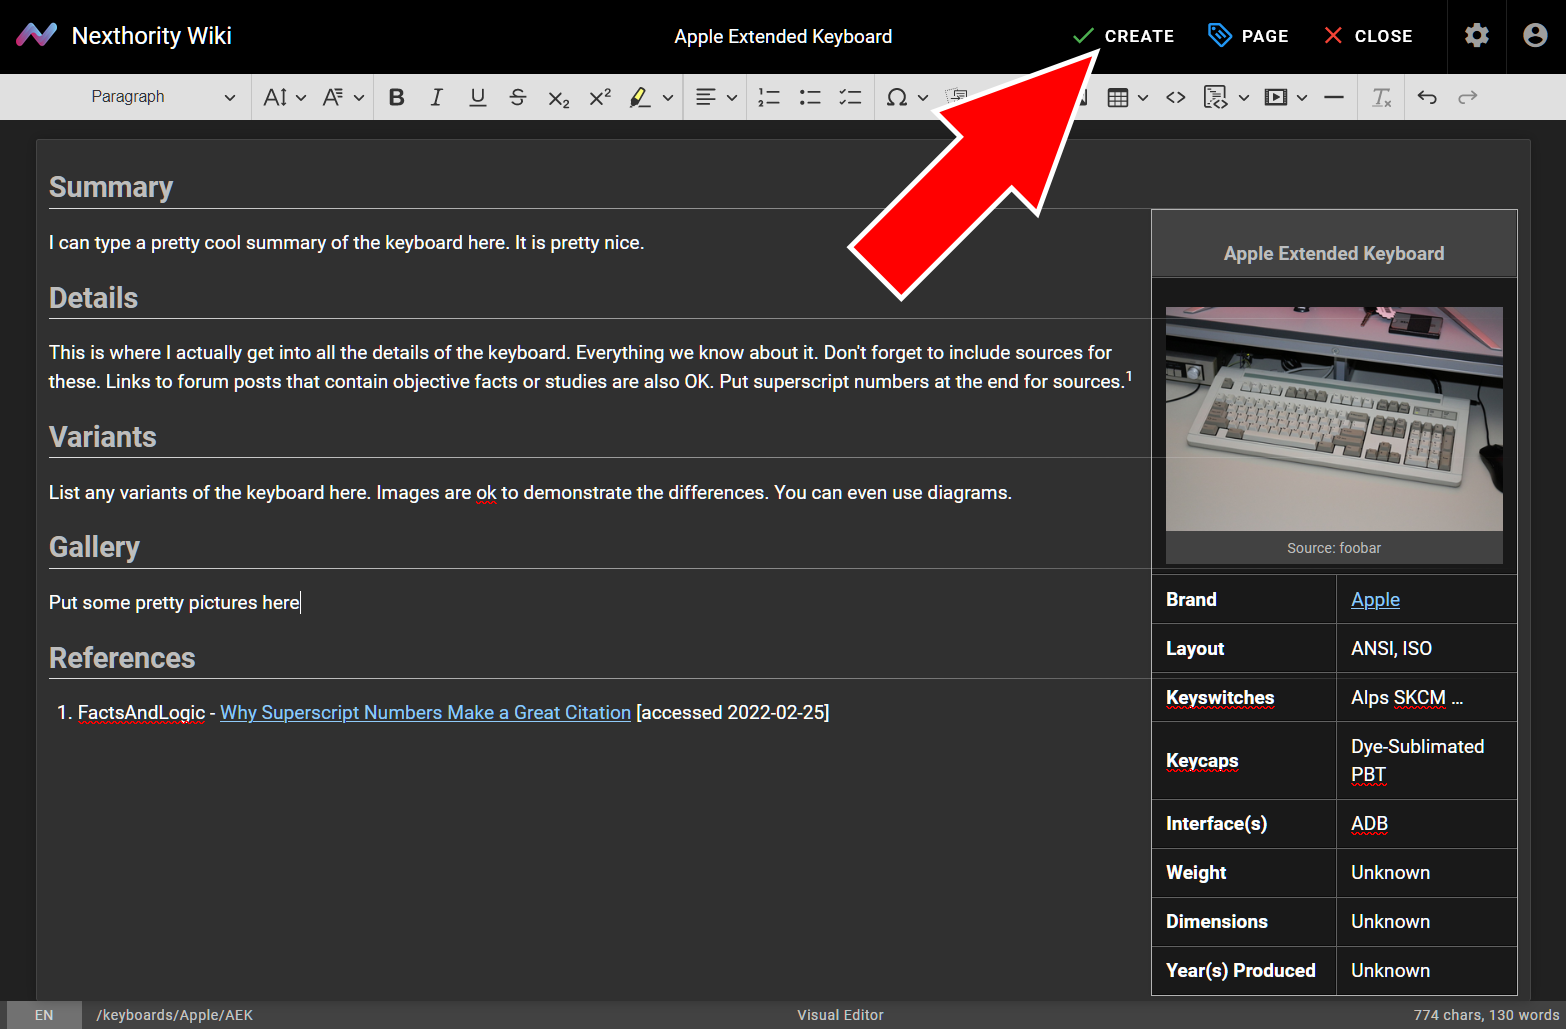
7. When you are done, press Create in the top right corner of the screen. You can now Press Close, or continue editing. Make sure to press Save to save any additional changes you make.
¶ Creating a Directory
(tutorial with images on how to create master pages that contain only links)
¶ Editing an Existing Page
Editing a page is simple. Press the blue pencil icon in the bottom right corner of the screen. Don't see that button? You may not have the correct permissions. Please contact us in the Discord server linked at the top of this page to request access to editing.